I’ve lost count of how many times I’ve bought a shirt I loved—only to realize it fit more like a dress than a tee once I got home. If you’re here because something feels too loose, too boxy, or just not right, learning how to shrink a shirt can save you time, money, and a trip to the tailor.
Shrinking a shirt isn’t complicated, but it does require intention. Fabric matters. Heat matters. Timing matters. I treat it like part of my laundry routine, not a risky experiment. Once you understand the basics, you can control the fit instead of crossing your fingers.
Why Do Some Shirts Shrink More Than Others?
Shrinkage comes down to how fibers react to heat and moisture. Natural fibers hold tension from manufacturing. When you add hot water and heat, those fibers relax and tighten back up.
Cotton shrinks easily because it absorbs water deeply and reacts fast to heat. Wool reacts even faster but can felt if you aren’t careful. Synthetics like polyester resist shrinkage because manufacturers design them to hold shape.
I always check the care label first. If I see “100% cotton,” I know I have room to work. If I see “pre-shrunk” or “sanforized,” I manage my expectations and aim for subtle changes instead of miracles.
How Can I Tell If a Shirt Will Shrink a Lot?

Before I do anything, I read the tag like it owes me money. The fabric blend tells you almost everything you need to know.
If the label recommends cold wash, air dry, or tumble dry low, that shirt reacts strongly to heat. That’s your warning sign. Shirts that say “do not tumble dry” usually shrink fast and unevenly if you ignore that advice.
I also think about structure. Knit T-shirts shrink more than tightly woven button-downs. Brand-new shirts shrink more than old favorites. Cheap cotton shrinks more than higher-quality long-staple cotton. When in doubt, I assume shrinkage will happen and move slowly.
What’s the Best Everyday Way to Shrink a Shirt?
For most shirts, especially cotton tees, I stick to the washing machine and dryer. It fits naturally into my routine and gives me control.
I wash the shirt inside out on the hottest water setting with a long cycle. The heat relaxes the fibers, and the water lets them reset. I protect graphics by flipping them inside out first.
Then I move the shirt straight into the dryer and use the highest heat setting. This is where most of the shrinking happens. I check the fit while the shirt is still warm. If it’s close but not perfect, I repeat the process once more instead of overdoing it.
How Do I Shrink a Shirt Even More on Purpose?
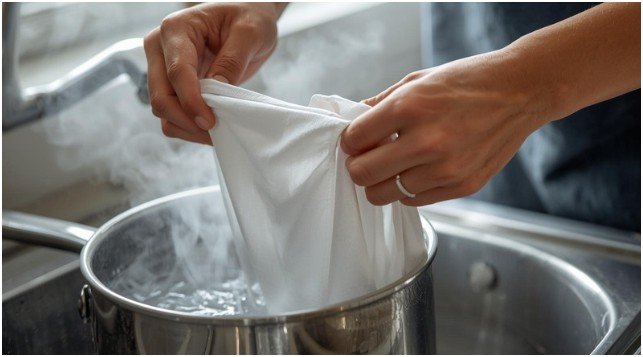
Sometimes I want real shrinkage, especially with oversized cotton or thrifted finds. That’s when I use boiling water.
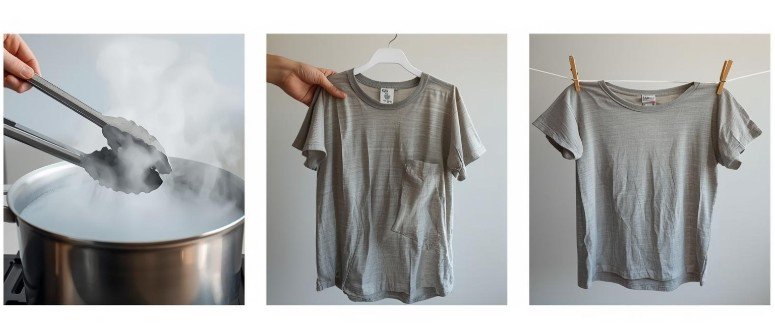
I boil a large pot of water, turn off the heat, and submerge the shirt using tongs. I let it soak for five minutes for mild shrinkage or up to twenty minutes for more dramatic results. Time equals control here.
After soaking, I wring it gently and either dry it on high heat for maximum shrinkage or air dry if I want to stop things from going too far. This method works best on natural fibers and demands attention, but the results show up fast.
How Does Fabric Type Change the Shrinking Process?
Not all fabrics play by the same rules. I adjust my approach based on what the shirt is made of.
| Fabric Type | Shrinkage Potential | Best Method |
| 100% Cotton | High (up to 20%) | Hot wash and high-heat dryer |
| Wool | High (may felt) | Lukewarm wash, steam, air dry flat |
| Linen | Medium | Hot wash or boiling method, air dry |
| Rayon | Medium (up to 10%) | Hot wash and high heat |
| Polyester/Synthetics | Low (under 3%) | Repeat hot wash and dryer cautiously |
Pre-shrunk shirts rarely shrink more than three percent. When I need to drop more than one size, I stop experimenting and consider tailoring instead.
How to Shrink a Shirt Step by Step
Step 1: Check the Label
I confirm fabric type and washing limits. This step prevents regret later.
Step 2: Wash on Hot
I turn the shirt inside out and wash it using the hottest water setting and a long cycle.
Step 3: Dry on High
I move it immediately to the dryer and use high heat. I check the fit while it’s warm.
Step 4: Repeat or Stop
If it still feels loose, I repeat once. If it fits, I switch back to cold washes moving forward.
Step 5: Lock the Size
Once it fits right, I wash cold and air dry from then on to preserve the shape.
What Mistakes Cause Uneven or Ruined Shrinkage?
The biggest mistake I see is rushing. High heat without checking progress leads to twisted seams or a cropped surprise. Over-agitation ruins wool. Stretching a wet shirt cancels the shrinking you just did.
Another common mistake involves graphics. Heat cracks prints fast. Turning shirts inside out helps, but extreme heat always carries risk.
If something feels off mid-process, I stop. Shrinkage happens fast. You don’t need to push it.
FAQs About How to Shrink a Shirt
1. Can I shrink a shirt just a little?
Yes. Use hot water and low or medium dryer heat, then stop early. Controlled shrinkage works best when you check fit while the shirt is warm and flexible.
2. Will a shirt keep shrinking every time I wash it?
Most shrinkage happens during the first few hot washes. Once fibers settle, future shrinkage slows down unless you keep using high heat.
3. Can I shrink only one area of a shirt?
You can use steam or an iron on areas like cuffs or waistlines. I do this carefully and avoid dragging the iron to prevent distortion.
4. Is shrinking permanent?
Usually, yes. Once fibers tighten, they don’t relax again unless stretched aggressively. That’s why I go slowly and stop early.
So… Did the Shirt Win, or Did You?
Shrinking a shirt feels oddly empowering. Instead of settling for “almost fits,” you take control and make it work for your body and style. I treat it like a finishing step, not a gamble.
My best advice? Go slow, respect the fabric, and stop as soon as it feels right. A perfectly fitting shirt changes how you stand, move, and feel—and that’s always worth the extra care.
Leave a Reply